|
05/28/00 |
 |
05/28/00 |
|
05/28/00 |
|
05/28/00 |
Boba
Fett
(Marmit
Customization)
I bought the Marmit Boba Fett figure kit with much eager anticipation. from everything that has been said about it I was expecting quite a lot, considering that I had paid lot to get him. Everything that's been said about the sculpting is true, it is by far the most accurate Fett I've ever seen.
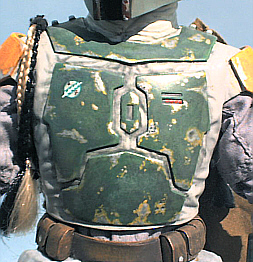
But the paint job leaves oh so much to be desired. From his lime gray armor plates to the lemon yellow shoulder & knee pads, the painting of the Boba Fett kit is far from exemplary. Put together straight from the box he has an overly plastic look acentuated by the bland and partially incorrect paint job.
|
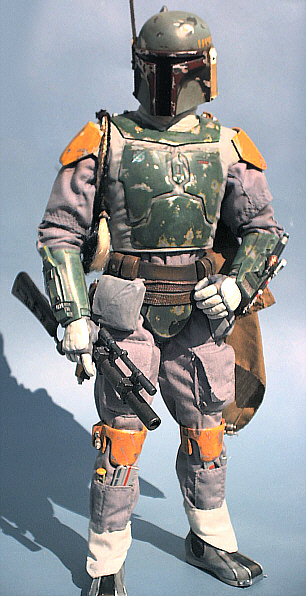
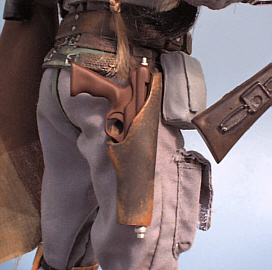
Ok, so here it is, I've repainted up Boba Fett and finally took the pictures. I used several resources while painting him in order to get a close approximation of the prop armor, but I had to improvize here and there to get the complete look. Every piece of plastic on this figure has been entirely repainted, with two exeptions, the side pistol, which I forgot to paint, and the helmet. For that, I merely repainted the visor area and touched up some of the dent/scratches.
Note: I have yet to attach the hoses which conect to his gauntlets yet, and I misplaced his 'wookie scalps' while I was painting the figure and am using the Hasbro ones temporarily. I might post more pictures when I find the originals. |
 |
|
|
 |
| . | |
|
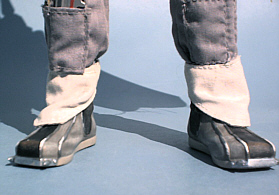
~ - ~ The pockets on his thighs didn't look right when I was finished either, so I placed a couple of cardboard squares inside them to retain the correct shape. ~ - ~ When I did the boots I wanted to give them a very worn look, so I painted the ribbing to apear as if the cloth covering has been partially torn away. The photo makes it apear as if it's silver, but its actually just gray, with the white exposed areas. |
| . | |
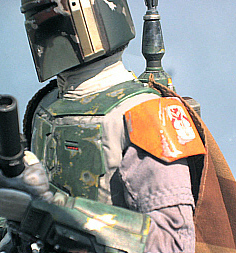 |

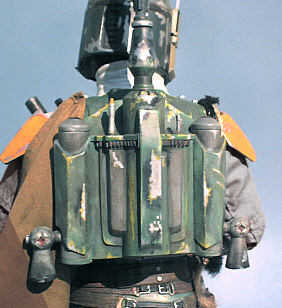
Here's a few close up pics of the repainted shoulder & knee pads. You can also see how I painted the tools in his pockets as well. |